Designing as a crafty dev

If you’ve been here before, you know I’m a frontend developer! If not, welcome to my blog! Like any dev, it’s hard to resist that well-known itch to re-do my personal website. So here we are. I’ve given my website a facelift for two reasons:

  1. I want to support more blog post topics than just tech.
  2. I want to use Next.js because that’s what I’ve been using at work.

I’ve always been a crafty person with an eye for design. I designed all previous iterations of this website! But I’m by no means a graphic/web/frontend designer, so it is super easy to get overwhelmed when planning out a new design.

Why is it so hard to get started? Well, frontend design is honestly blank canvas/page syndrome to the max. When painting, you at least have a limited color palette; or when decorating a room, you have a budget.

When designing a website, it is easy to be overwhelmed because you have virtually every color and font and every way of configuring that content that you can imagine.

Get some inspo

Taking inspiration from how I approach planning a room, my first step was creating a Pinterest board and pinning anything I liked. Fonts, layouts, colors, etc. This helped me see everything I was drawn to all in one space, identifying the patterns that emerged.

Looking in my closet and around my apartment, I obviously love greens and creams together. So obvious, in fact, that one day in a 1-1, I realized I was on a dark teal couch with a dark green sweatshirt with my pale complexion holding a mug with a dark teal/green dipped bottom and creamy top. When you start paying attention, you’ll see patterns pop out.

Mood board resources:

Narrow it down

We’ve gone from staring at a blank screen to staring at pictures and colors and fonts that we like. So let’s key into our patterns!

Colors

We just made mood boards with colors, so start with the color combos that pop out to you there, whether you saved actual color palettes or just images. We’re going to aim for 5 starter colors:

  • Background color (Usually white or off white)
  • Text color (Usually black or off black)
  • Main color (Pick your favorite color!)
  • 2 Accent colors (You can choose more if you want, but 2 is very doable. These should make your main color look its best!)

And then, let me introduce you to your new best friend: Coolors.co!

Coolors.co

First, go to coolors.co/generate. If you have any colors for which you know the exact hex, go ahead and input those and lock them in. Then have at it with the space bar to auto-generate color palettes! It looks like coolors does a good job of giving you a mix of complementary, contrasting, and triadic color schemes. If you’re not set on the exact hex code, play around with the colors you started with. You never know what you’ll find!

When playing around with the hues and tones, I suggest using HSL. This is a color code based on Hue, Saturation, and Luminance. HSL is much closer to how we think of color mixing, thanks to elementary school, than something like RGB.

Quick accessibility note

Now that you’ve found some colors you like, let’s refine them while thinking about accessibility. Here are your steps

  1. Go to https://webaim.org/resources/contrastchecker/
  2. Test 1: your text color on your background color, make either darker or lighter as needed
  3. Test 2: your main color on your background color, again adjusting & checking test 1 if you change your background color
  4. Test 3: either your dark-ish or black-ish color on your main color as a background, think CTA buttons needing text

Fonts

First, look at your mood board and notice what fonts you saved have in common. Are they serifed (have feet)? Are the sans-serif (no feet!)? Are they more blocky? Handwritten? We’re going to choose 3 fonts here:

  • Logo font
  • Header font
  • Base (paragraph) font

I didn’t use the same font in my logo as I did in my header because I read a blog post saying that you need to keep your logo distinct. But that’s up to you!

In a book, paragraph fonts are usually serifed. The feet of the serif drag your eyes across. They provide movement. Sans-serif fonts tend to be a little crisper on a screen because a consistent stroke is easier to render than a tapering edge. Do you want people to stop and take notice? Or sit and read?

You can find fonts anywhere, but I’d recommend skimming through Google Fonts. Their fonts are free and open source and are super easy to include in your website. They are also pretty widely available in other systems, like Figma! If you want help narrowing down options, Typewolf has a great guide on Google Fonts.

My “brand name” lends itself easily to an emoji. I actually had the emoji in mind when brainstorming a consistent handle across platforms. So I’ve always used ✨ as part of my branding.

I used Canva’s logo templates to play around easily and see what I liked. I keyed in on a design, but with Canva, you don’t own your logo. So I keyed into the design I liked the most and used it as inspiration in Figma.

In Figma, I developed a logo icon and a logo with my name in it. The icon lends itself to favicon use, and the full logo lends itself to the header. I then made heavy use of Figma allowing you to right-click and copy as SVG to save my designs!

Swatch it all together

Using Figma still, I put my logo icon, my full logo, and a swatch of my colors and fonts together. I want to pause here and say I never really used Figma before this project, so I don’t know all of the ins and outs, just kind of futzed with it until I had something that looked reasonable.
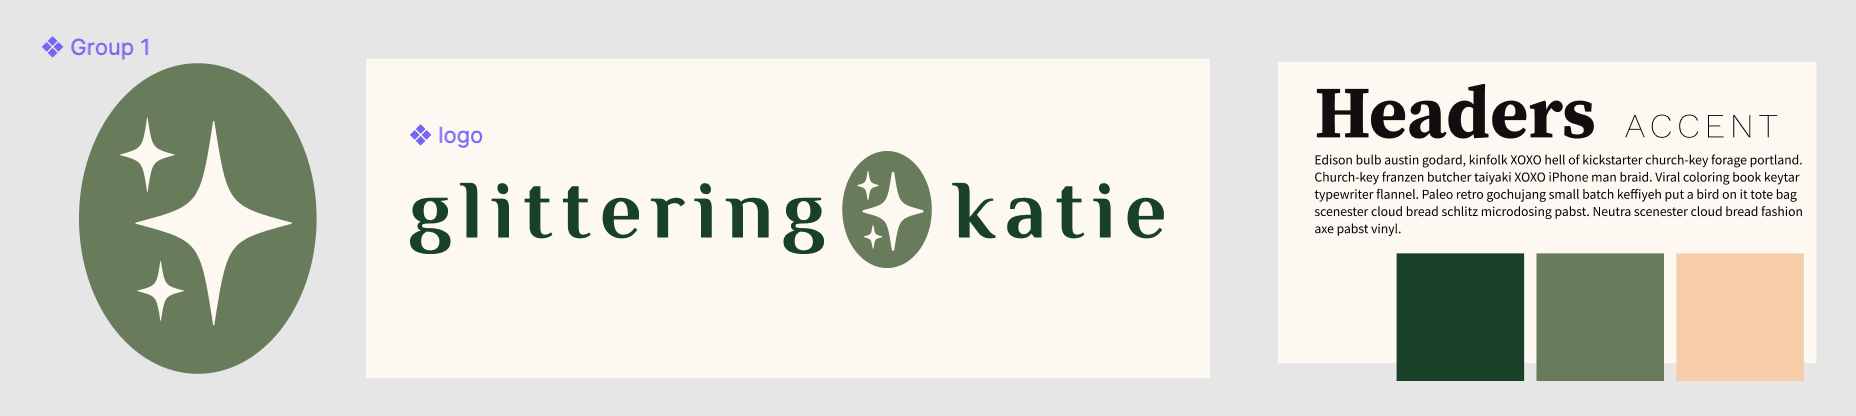
unorganized screenshot of my logos & font/color swatch

Layout

Alright! We have colors! Fonts! A LOGO! We’re ready to go now, right? I really want to plead with you, developer, that you should spend the time actually laying out your pages in Figma or on a sheet of paper or whatever. Creating a layout isn’t as easy as it seems when you have no plan. Again, we’re dealing with the ultimate blank canvas syndrome.

Did you save any layouts on your mood board? If you didn’t, surf around the ‘net now and find similar websites to yours. Go on some website template services and see how they layout content. Don’t copy directly but take inspiration.

Real content

You know how when you were a kid, and you drew a speech balloon and tried to fit text inside of it only to find out you didn’t leave enough room? That’s going to be you now if you don’t take the time to think through your real copy.

Real talk? Step all the way away from your design editor. Just do this in a document using bullet points to represent different sections, side-by-side sections, or links to other pages.

All together now

Once we have realistic content and have decided on colors, fonts, and logos, it’s time to put this puzzle together! Make a layout for every page you intend on having, no matter how simple that page will be. I promise taking the time to do all of this planning will lead to a better thought-out website, and it will make your coding process more straightforward.
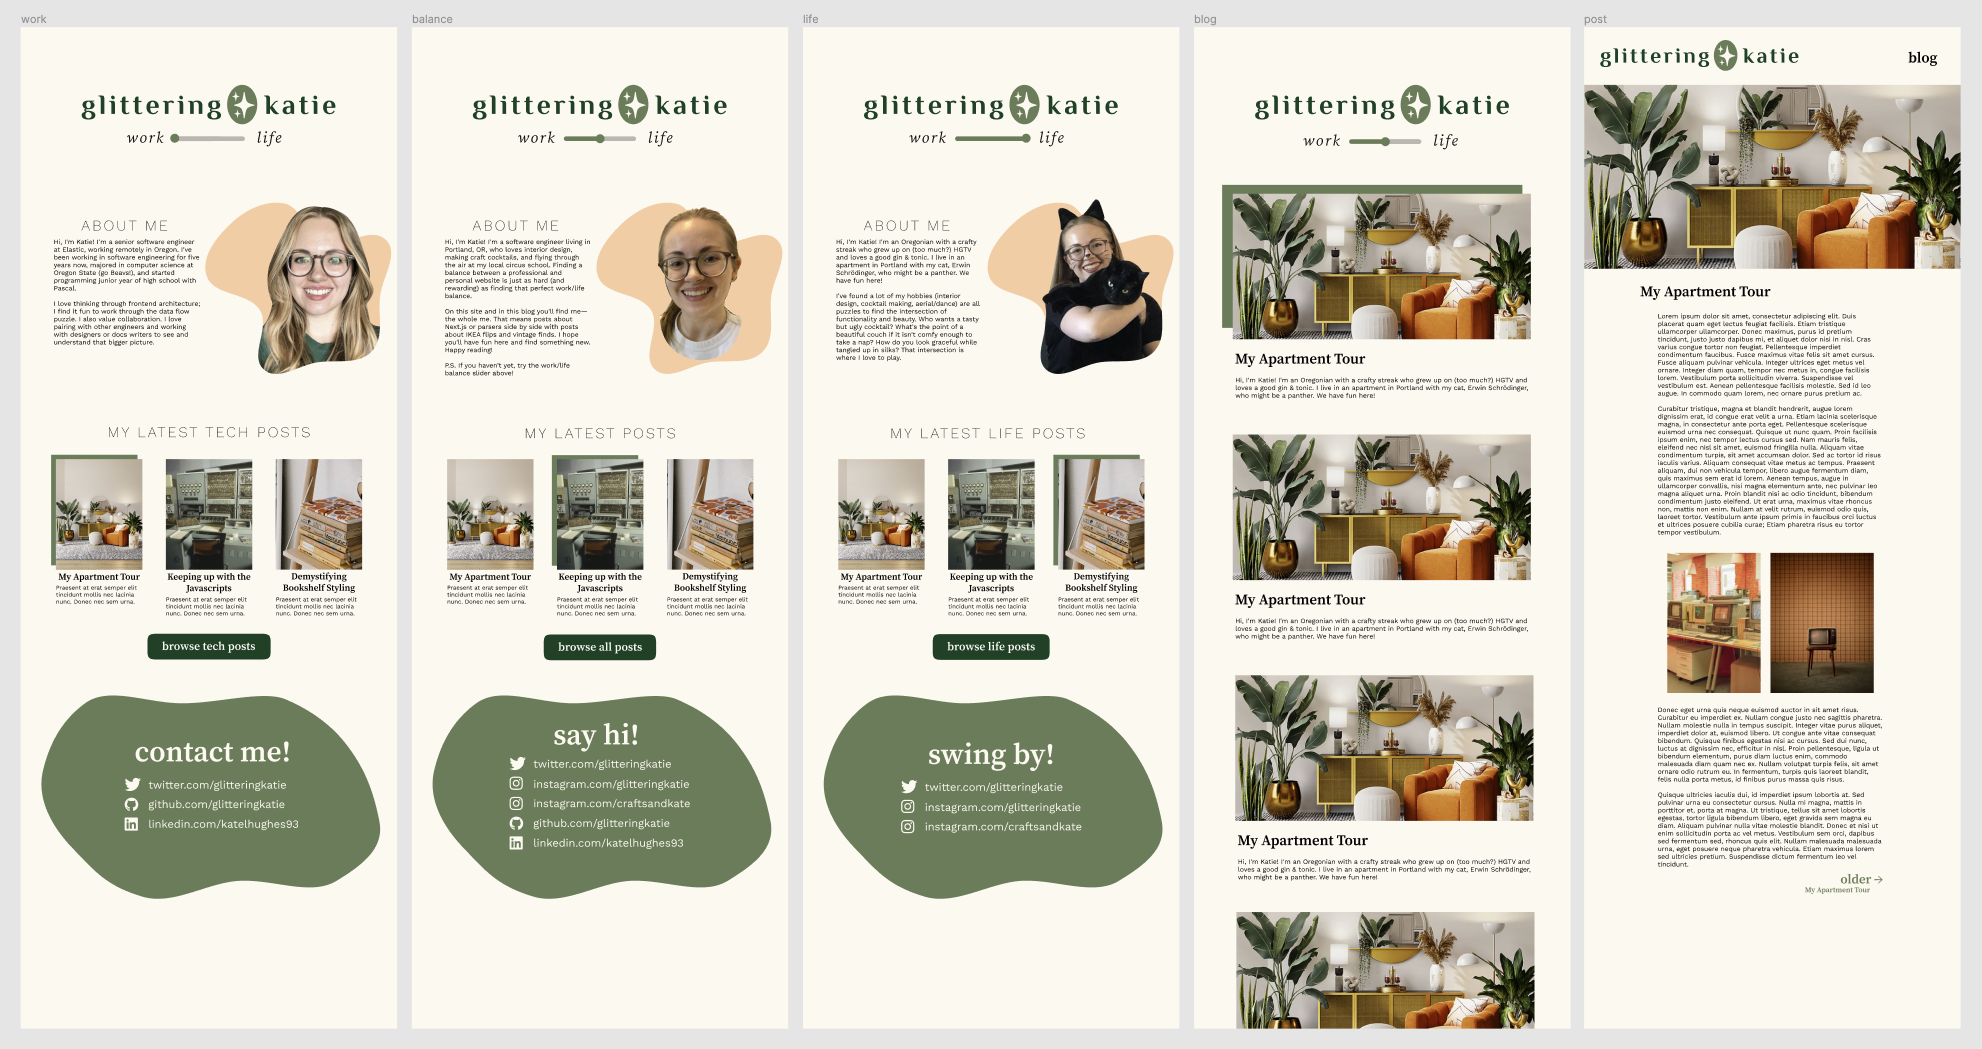
screenshot of all of my layouts planned in figma

You got this

This whole thing takes time. But once you have a solid design plan, it will be worth executing it and making it live. For me, it took around 25 days to go from nothing to deploying on glitteringkatie.com.

When I decided to redesign, I was ready to immediately get coding. But I made myself take the time to really think through my design. Honestly, once I had a design, I didn’t even want to code at that point. Ultimately the motivating factor for me wasn’t, “Wow, I’ll have an even nicer tech blog!” Instead, it was, “Wow, when I’m done, I’ll have better functionality to support posts about furniture flipping and random crafts!” If you’re putting in this hard work, know why you are doing all of this work!

I hope something in this blog post helped you! And stay tuned for some non-tech content in the future!

🍿 Keeping Up With the JavaScripts

In July 2020 I found myself as part of the many people affected by COVID-19 related layoffs. Before that, I was writing anything from Elm to Ruby to Elixir at NoRedInk. And before that I was working with JavaScript and React for three years at AppNexus.

It was fun to get the chance to write Elm professionally! But when I found myself looking for a new job, I decided I was ready to get back into the mainstream. After not writing any JavaScript for a year and a half, I was hired at Elastic under the posting of “JavaScript Engineer”.

So how did I brush up on JavaScript?

Hooks

Through my JavaScript gap year (and a half), I still followed JavaScript community members on Twitter, which gave me a rough idea of what was happening. At least, I was aware of functional components and React hooks (but not enough to know they were related concepts).

I checked in with some friends in a former-coworkers slack and they said, “Yes, learning hooks IS worth your time!” and also, “Yes, actually read React’s documentation because it is actually good” (mildly paraphrased). They haven’t lied to me about JavaScript yet so I went with it and used that as my jumping-off point.

I did actually read all of React’s documentation on hooks and I’m here to tell you: Yes, it is actually good documentation! When I felt good with my hooks knowledge, I looked into Elastic’s component library (EUI) for some real-life examples.

A particular question I had in mind was around setState: is it more common to see one call to setState with an object representing state? Or more common to see multiple calls to setState, each with their own variable that would normally make up the state object?

I figured looking up a form would easily tell me that since forms usually have multiple variables tracked in the state. I found a form example and the answer to my question: multiple calls to setState!

Muscle memory

Alongside learning about what had changed about React (not as much as I thought would have changed), I also wanted to get my muscle memory for JavaScript back. Brush off the dust, so to speak.

I wasn’t sure how to go about this at first. I tried Codecademy but remember, I’ve written JavaScript professionally for three years so while Codecademy was great when I was learning, I wasn’t starting from square one. Turns out the best way to re-acclimate is… just to write JavaScript. I had a few different paths for this.

Tarot side project

Before really diving in deep, I tried to give myself about a week off from stressing (guess what: stress still happened). During this time I at least found the space to be creative and came up with a fun project! In typical side project fashion, it is not finished at the time of writing this post but will hopefully be good fodder for a future post.

I wanted to build a tarot deck companion web app: you pull a card, the computer tells you what it means. The trick with future telling type stuff is to keep things as vague as possible so that was the route I took.

I got to play with a natural language processing library, Natural, and a sentence templating library, Sentencer. I’ll keep the longer description for another blog post but all in all: having something I was excited to work on, and doing that in JavaScript, really helped me get my JavaScript muscle memory back.

InterviewCake

When I was interviewing, InterviewCake had an amazing deal to support folks who had been laid off due to the coronavirus pandemic. It felt like a far more enjoyable read than some nameless interview books out there and it had interactive examples!

Every weekday I gave myself a goal of InterviewCake problems to get through and this really helped me brush up on my JavaScript.

This blog

I had been wanting to move away from Medium for a while but didn’t want to over-engineer a personal blog. When I was interviewing for my current job, they mentioned that the project I’d be joining was currently written in Gatsby. Given those two facts and my free time, I figured it was time to play with Gatsby.

Building up my blog was really one of the first times during my interview prep where I felt like I was in a real React codebase—not just some toy interview question. It felt really nice to be back.

I did over-engineer one thing: at the bottom of the page where there is usually a “Made with ❤️” statement, I added functionality to randomize the emoji from some of my favorites. I then decided that I should take seasons into account and added in some date checking to bring in Halloween and birthday emojis (September, October) or Christmas and winter emojis (November, December). Being excited about a little piece of functionality made JavaScript practice feel like play instead of work.

On the collective mind

For more conversational interviews, I wanted to figure out what the JavaScript collective was thinking about. I skimmed through titles of talks from React Conf 2019 and that was helpful.

One talk that I watched was The State of React State in 2019 by Becca Bailey. This helped me see how thoughts on state had changed since hooks came out. It was a great broad overview for me to get up to date.

I also watched Accessibility Is a Marathon, not a Sprint by Brittany Feenstra. When I was writing Elm, there was a strong push for accessibility to be a default. I was really interested to see how the React community was thinking about it. I was glad to see the push for not breaking semantic HTML since when I left, it was totally fine to leave divs all over the place.

Practice interviews

In addition to all of this prep, practice interviews with friends who work in JavaScript day-to-day also really helped. I got the practice of pretending I’m in an interview but at the end, I also got to ask, “Okay, what is out of date in the JavaScript I wrote? Can you help me modernize this with hooks?”

When I last was writing JavaScript, I was working with the best practice that if you’re using lodash, just use it for everything even if Array.prototype has the given function. During practice interviews, I got to learn that people now lean towards Array.prototype functions first.

Verifying my assumptions and understandings with someone who works day to day in JavaScript significantly helped me gain my JavaScript confidence back.

One month in

I am writing JavaScript again! One month in, I have had a few moments where I’ve gone to write something and it comes out in pseudocode-gibberish (looking at you, switch/case), but for the most part, I’m back to writing JavaScript fluidly again.

In my first computer science class in high school, we were learning Pascal, something my CS teacher admitted was outdated for 2010. But my teacher told us something that has always stuck with me: focus on the semantics not the syntax. I’ve been able to hop around to different languages because I know my core concepts, learning the syntax of a language can come second.

I was hired because of how I think as an engineer, not because I can write a given language. And in the end, an employer with that order of priorities is the kind I want to work for.

💌 A Love Letter to JavaScript

Dear JavaScript,

We’ve barely spoken in the past year but I still think about you. You were my first self-taught language and it built me a career. JavaScript, you taught me to let go some of my perfectionism because it’s so easy to just get started, and make something, knowing that iterations will always be necessary. And it was through you that I learned to love functional programming.

I met you, briefly, sophomore year of high school. It was before I even knew what computer science was but I met you and I knew that I liked programming. I learned Pascal, Java, C, C++, and eventually I’d come back to you.

In bits.

Over years.

College told me I’d be an embedded programmer, learn C, go to Intel. I applied to a 6 month web development internship. Finally we reconnected and you, JavaScript, started my career. 6 months turned into 3 years.

You’re not perfect and oh boy did I try to make up for it. Paralyzed, I’d sit, not sure where to start because there were so. Many. Different. Ways. To start. And that is the lesson you taught me: get started now, with something, a small version of my goal. Getting started is the hardest part but if I can do that fast, the next iteration will get me to a closer, better state.

Over and over until perfect can’t be the enemy of done.

I stood on the shoulders of those who have shot themselves in the foot and learned how to be safer in JavaScript. I saw in you what functional programming looked like. Not all at once, but little by little. Incrementally.

From so many other people who also loved you and wanted you to be better, I learned pure functions; I learned to make every variable a constant; and I learned to love your libraries of composable functions.

I learned Haskell and Elm not in spite of you, JavaScript, but because of you.

Thank you for all that you’ve done, all that you were, and all that you taught me.

You may not be perfect, but goddamnit did we grow.